
Real brick is one of the boldest building materials you can use to make a huge aesthetic upgrade to the interior of your home. Installing faux brick panels is a great way to achieve the look and feel of real brick. As opposed to real brick, faux brick is lightweight, and easy to install yourself.
Better yet, using faux brick instead of the real thing will save you money, while increasing the value of your home at the same time. Creating an interior accent wall or refreshed home exterior using real brick comes at a high cost and includes hiring extra labor. With faux brick, you can install it yourself, in just a couple of hours. And it's highly cost-effective.
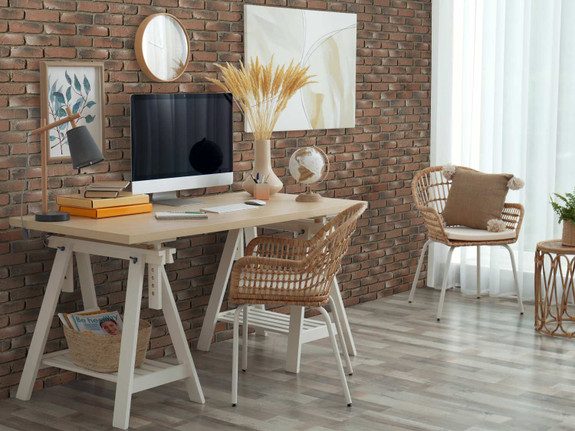
Whether you want to install faux brick walls in your home office, under your kitchen countertop, or on your living room mantle, the easy steps outlined below will make sure your project is a success.
Tools & Materials For Installing Faux Brick Walls
Before you begin, gather these tools and materials:
- Faux Brick Panels
- Caulk gun
- Loctite PL 3X Premium Construction Adhesive (one tube per every three panels is best)
- Long high-quality screws and screwdriver
- Wood cutting saw with a finish blade (to cut panels)
- Level
- Safety glasses (recommended to wear throughout the entire process)
- Small paint brush
- T-square
- Chalk line/laser
- Tape measure
- Touch-up kit
- Water
- Pencil or chalk
- Color coordinating textured caulk
- Cotton swabs
- Clean cloth or a wire brush (for harder surfaces)
Adhesive and Fastener Installation
- Deck screws
- Screw gun/drill driver and drill bits
Adhesive Only Installation
Use this method if you are installing faux brick panels over concrete, masonry, or metal.
- Disposable gloves
- Great Stuff Applicator Gun
- Great Stuff Pro Gun Cleaner
- Great Stuff Pro Construction Adhesive
How to Install Faux Brick Wall Inside Your Home
Installing faux brick panels inside your home is simpler than installing real brick. In fact, it can be done on your own.
The instructions below provide a basic overview of the installation process. When you are ready to install, click here for a full installation guide.
Step 1. Make Sure Your Panels are Properly Oriented
Faux brick panels can only be installed one way - right to left. For more information on orientation options, click here.
Since your panels are hand-painted, it is recommended to lay out your panels near the installation site to be sure the side-by-side color variations are to your liking. These subtle variations make your faux brick panels even more realistic.
Step 2. Clean and Prepare Installation Surfaces
Before anything else, be sure your installation surface is sturdy and in good condition.
Next, it's important to wipe your surfaces clean of any debris, to ensure a tight bond. Drywall and other surfaces can be wiped down with a clean rag or tack cloth, while harder surfaces may require a wire brush. It's also recommended to wipe down the backs of your panels with a cloth to remove any dust or debris. This will ensure your surfaces are clean enough for the adhesive to stick.
Step 3. Draw Your Level Line
Set a panel against the wall. Using your pencil/chalk and level, mark the top panel, and then draw a level line along the length of the wall. This will keep you moving in a straight line.
Step 4. Install Corner Pieces (optional)
If you are using corner pieces or endcaps as part of your faux brick wall, the first corner/endcap must be installed before starting the first row of panel installation. For more detailed instructions on installation, click here.
Step 5. Trim Your First Faux Brick Panel
You’re well on your way! At this point, you’ve made it through the installation prep phase. Now your wall begins to come to life.
If you are installing interlocking corners or endcaps, you can skip this step. There is no need to trim.
If you are not installing interlocking corners/endcaps; it's recommended to trim at least ¼ of the width off your first panel. This will leave you with a usable piece for later in the project and reduce waste. Detailed instructions for trimming the first panel (if needed) are here.
Step 6. Apply Adhesive
Now you’re ready to adhere your faux brick panels to the wall. A big transformation is ahead!
Depending on your installation method; you’ll follow the adhesive-only application or the adhesive-fastener application.
With adhesive; it’s best to turn the panel over on a soft surface and apply beads of adhesive to the back of the panel in vertical lines.
Step 7. Adhere Panel to the Wall
With glue applied to your panel, adhere it to the wall. It helps to use a bit of a twisting motion and a good amount of pressure to create a lasting bond. Be sure that the top of your panel matches up with your level line.
Step 8. Screw Panel to the Wall
If you are using the adhesive-only method, skip this step.
If you are using the adhesive and fastener method, you will fasten the faux brick panel to the wall after it has been glued on. Use one screw per square foot around the perimeter of the panel and between the faux bricks.
Step 9. Apply Adhesive and Textured Caulk
This crucial step enhances the look of your faux brick panels and ensures a secure bond to the surface.
You’ll see where the faux brick panels interlock/overlap. Apply a bead of adhesive to the tabs where the next panel will overlap. Then apply textured caulk where the face meets the panel for a watertight seal and finish that looks just like real brick.
Step 10. Repeat Steps 6-9 to Complete the First Row
Now you’re starting to see your home upgrade take shape!
With your first panel in place, repeat these steps for each one after. Keep an eye on your level line, so your rows stay straight. Apply textured caulk along the way for a more natural look. Ensure each piece is placed tightly against the others.
Pro tip: Before cutting or trimming a full-sized panel to fit at the end of a row, take a look at what you’ve already cut. You may be able to use a previously cut panel to avoid wasting a full-sized one. Another great way to save money!
Step 11. Start the Next Row
You’re in the groove and ready to complete your faux brick installation!
Start your next row directly above the other, while making sure to offset the seams. This will help your accent wall look more like real brick. Apply adhesive to the top lip of the panel below, and take your time when binding the next panel to the one below. Continue this process until you are finished covering your wall.
Step 12. Touch-Up As Needed
This is where you can apply more textured caulk where it's needed to conceal screws and use the included touch-up paint to further hide evidence of installation.
And just like that, your DIY project is complete!
Choosing the Right Faux Brick Panel for Your Interior Spaces

Faux brick walls are an attractive and affordable way to add some variety to your interior spaces. For homeowners, they can be placed virtually anywhere, including:
- Along walls in your den and other rooms
- Under kitchen or bath countertops and cabinetry
- Under mantels to create the look of a fireplace
- Anywhere you want to add a rustic, old-world feel
Faux brick walls are also a great way for contractors to improve the appearance of a space at a minimal cost.
When choosing the texture and color for your faux brick panels, keep in mind the effect you want to achieve. AZ Faux Rustic Brick Panels are available in six colors that all provide a rustic look. AZ Faux Contemporary Brick Panels are an excellent choice if you’re looking for a clean, modern appearance in four impressive colors.
To view more faux brick varieties click below.