
Are you on the search for a unique way to upgrade a fireplace in your home? Consider installing faux stone panels along the mantel and frame for an instant DIY fireplace refresh!
Faux stone panels are affordable, durable, and can even increase the value of your home — what’s not to like about that? Plus, they are a great way to update your space without having to demo your existing fireplace.
If you are not sure how to install faux stone panels on a fireplace, don’t fret. We have broken down the process step-by-step so it’s as easy and DIY-friendly as possible.
Table of Contents:
- Helpful Tips for Successful Installation
- Guide for Installing Faux Stone Panels On a Fireplace
- Faux Stone Fireplace Installation FAQs
- Get Inspired: Faux Stone Fireplace Ideas
- Start Your Faux Stone Fireplace Surround Project Today!
Helpful Tips for Successful Installation
Before we walk you through the faux stone panel installation process, we’ll share some helpful tips to ensure a quick, safe, and successful installation.
- At AZ Faux, we carry a wide variety of faux stone panels that vary in different styles and colors. If you’re unsure of which panel is best for your fireplace, order a sample of your favorite panels so you can assess the color and style in your space before ordering.
- Panels cannot be adhered to weak walls or those in poor condition. Before you get started, inspect your fireplace thoroughly. If it's not structurally sound, it may not hold the weight of the faux stone panels.
- Be sure to follow all applicable building codes and comply with clearances set forth by the manufacturer of your fireplace. Always leave a non-flammable border of at least 6” between the fire box and the panels.
- At least 24 hours before installation, lay your panels on a flat surface. Keep them away from moisture, direct sunlight, and heat sources. This will allow them time to acclimate to the installation location.
Below is an overview of how to install faux stone panels on a fireplace. When you’re ready to install, follow our detailed installation guide.
Materials Needed
Gather the following tools and materials:
- Caulk gun
- Chalk line or laser
- Clean cloth
- Color-coordinating textured caulk
- Cotton swabs
- Level
- Loctite PL Premium 3X Construction Adhesive
- Panels
- Pencil
- Safety Glasses
- Small Paint Brush
- T-Square
- Tack cloth
- Tape measure
- Touch-up kit
- Water
- Woodcutting saw with finish blade
Faux stone panels can be installed in one of two ways:
- Adhesive only (over concrete, masonry, or metal) or
- Adhesive and fastener method (recommended)
If you choose to install using the adhesive-only method, you’ll need these additional materials:
- Disposable gloves
- Great Stuff Applicator Gun
- Great Stuff Pro Gun Cleaner
- Great Stuff Pro Construction Adhesive
If you choose to install using the recommended adhesive and fastener method, you’ll need these additional materials:
- Deck screws
- Screw gun/drill driver and driver bits
Guide for Installing Faux Stone Panels On a Fireplace
Now that you’ve prepped your space, gathered all tools and materials, and found an amazing faux stone panel for your DIY fireplace project, it’s time to get started! Watch our helpful faux panel installation video for additional guidance as you work through the installation process.
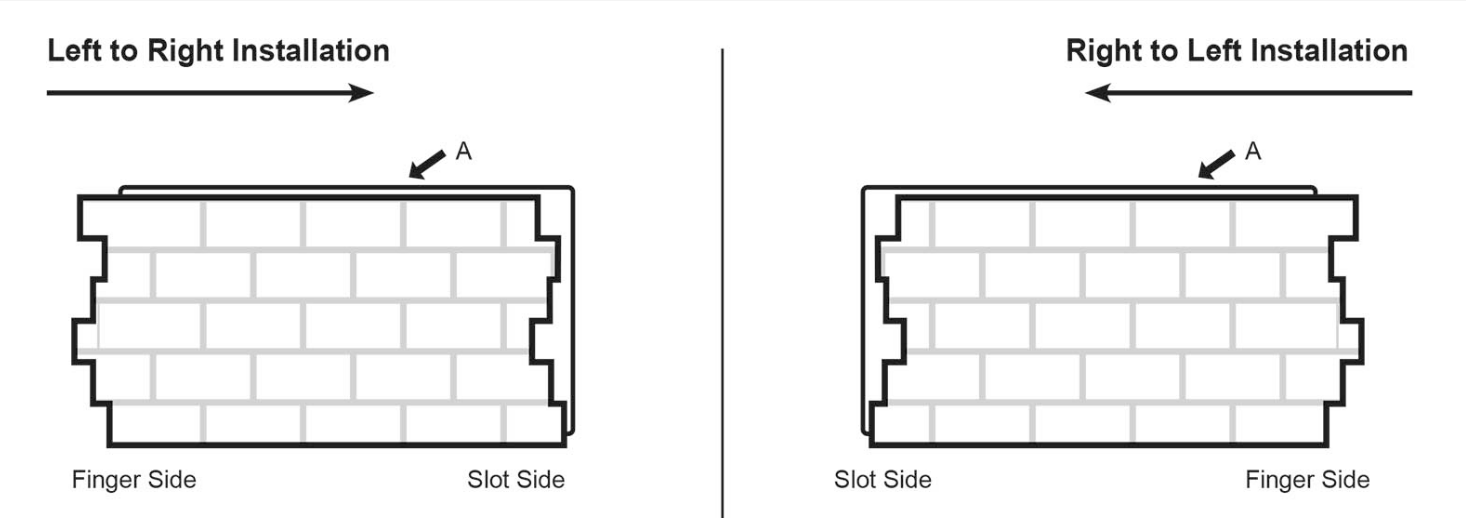
Step 1. Determine the installation order of the panels
Your panels can only be installed in one direction, depending on the panel style. So, you need to determine which direction your installation should flow.
To do this, simply orient one of your panels so that the flat lip (A) is up. If the fingers of your panel project are on the left, you will install left to right. If the fingers are on the right side of your panel, you’ll install from right to left.
Step 2. Prepare your surfaces
Panels adhere best to clean surfaces. To ensure a strong bond, use a clean cloth to wipe the surfaces of your panels and your fireplace to get rid of any debris, dirt, or dust. If the surface of your fireplace is hard, you may need to use a wire brush to remove loose debris.
Step 3. Trim the first panel
If you are installing interlocking corners, skip this step.
Turn your first panel over and mark where you intend to cut it. Trim the panel, using a wood-cutting saw with a finish blade. To minimize waste, cut off at least ¼ of the panel.
Step 4. Draw your level line
Find the high point on the floor/ground using a level. Place a full-size panel against the surface of your fireplace and mark the height. Extend your level line across the length of the fireplace.
Step 5. Apply adhesive
If you’re installing using the adhesive and fastener method, apply beads of adhesive to the back of the panel in vertical lines spaced no more than 3” apart. Then, add a dab of adhesive to the back of each finger.
If you’re installing using the adhesive-only method, apply beads of Great Stuff ProTM Construction Adhesive to the back of the panel in vertical lines starting 2” from the edge and in 6” increments along the interior of the panel. Then, dab the back of each panel finger.
Step 6. Adhere the panel to the fireplace surface
Use a slight twisting motion to ensure good contact between the panel and the fireplace surface. Make sure the panel is level and lines up with your level line, and is plumb with the edge of the fireplace surface.
Step 7. Screw the panel to the fireplace surface
If you’re using the adhesive-only method, skip this step.
Using deck screws, secure the faux stone panel to the fireplace by placing screws under protruding stones or in the grout lines to make them less noticeable. You should install one screw per foot along the perimeter and one screw per square foot in the middle of the panel.
It’s important not to overtighten the screws, as it could damage the panels.
Step 8. Add adhesive and caulk
Before installing the next faux stone panel, add adhesive and caulk to the lip of the panel, about 1 inch from the face. Then, apply a bead of textured caulk where the face meets the panel.
The adhesive helps minimize gaps due to seasonal expansion and contraction. The caulk will keep any moisture out. Use a clean cloth to wipe away any excess before it dries.
Step 9. Repeat steps 5-8
Be sure your panels fit tightly together, and continue following your level line. Dry fit each panel before applying adhesive to ensure it fits flush. Trim if necessary.
The last panel on the row will have to be trimmed from the finger side of the panel. Wipe off any excess caulk or adhesive before it dries.
Helpful hint: To reduce waste and save some cash, check to see if a panel you previously cut can be used to finish a row before you cut a full-size panel.
Step 10. Start the next row
Start your next row directly above the first panel you installed.
For a more realistic look, trim the first panel of the next row so that when installed, the seams will be offset. You may be able to use a portion of a panel from another part of the job.
Before installing each panel on the next row, apply adhesive to the top lip of the panel below it.
Take care when placing the panel to ensure a tight fit with the panel below. Your panels should come together to create a shiplap joint.
Step 11. Touch-up as needed
Your installation is almost complete. Now it's time to make those final touches.
Using a bead of caulk, seal any mitered joints and where a panel butts against another surface (like a wall adjoining your fireplace). Add caulk to fill in voids, gaps, and holes from screw heads and blend before it dries. Use your touch-up kit and paint as needed to hide any imperfections and to create the most realistic stone look possible.
Faux Stone Fireplace Installation FAQs
 Sedona Dry Stack Faux Stone Wall Panels in Ocean Mist
As with any DIY project, you’re bound to have questions. That’s why we’re here to offer any help you need along the way. Here are some common FAQs about how to install faux stone panels on a fireplace.
What are the benefits of using faux stone panels?
There are many pros to using faux stone panels on your fireplace instead of real stone. A few of the benefits of faux stone panels include:
- More affordable than real stone
- Reduced labor
- More lightweight than real stone
- Easy to install over a single weekend
- Requires little to no maintenance
- Better consistency in the stone design
- Less messy to install
Can you put faux stone panels over a brick fireplace?
Yes! Because faux stone panels use adhesive, they can adhere to existing brick, concrete, metal, or masonry fireplaces. This can be an excellent time and money saver for you to have the fireplace of your dreams without having to demo a thing!
Looking to upgrade your fireplace with faux brick instead of stone? You can do that too! Check out our step-by-step guide for installing faux brick panels on your fireplace.
What are the best practices for fire safety?
Most of our products can be used around a fireplace opening, insert, or stove, but you must follow the fireplace insert/stove manufacturer's specifications for required clearances for placement of combustible materials.
Faux stone panels beautifully mimic the look and feel of natural stone, but they are not the real thing. If you plan to install your panels close to live flames, you must follow all building codes and instructions provided by the manufacturer of the fireplace insert.
Always leave a non-flammable border of at least 6” between the fire box and the panels. Some local building codes may require a larger border. Do not install faux stone panels on the hearth.
What fireproof panels do you have?
Our panels are not fireproof. We sell class-A fire-rated material that allows panels to burn at a slower rate, but it is still combustible. For safety, follow the clearances for combustible materials in the manufacturer's guidelines for the stove.
What do you do for the corners of the fireplace?
 Faux stone panel corner installation
We recommend installing interlocking corner pieces that make turning corners a breeze. Another option is to miter a corner or a clean edge. As always, please follow the fireplace manufacturer's instructions when installing corner pieces and panels.
Can this product be behind a wood-burning stove that will be used maybe three or four times a year?
Our products can be used behind wood-burning stoves, but you must follow the manufacturer's requested clearances for combustible materials. Please refer to our using products around fireplaces information on our website.
Get Inspired: Faux Stone Fireplace Ideas
Does your fireplace need an overhaul? Get some inspiration from these faux stone fireplace design ideas!
 Sedona Dry Stack Faux Stone Wall Panels in Brown Earth
Blend Modern Elegance With Natural Warmth With Faux Stacked Stone Panels
Yes, you can install faux stone panels outdoors, too! Our faux stone panels are resistant to damage from moisture, pests, and fading in harsh sunlight.
Surrounding the fireplace are Sedona Dry Stack Faux Stone Panels in Brown Earth.
This outdoor fireplace is the center of attention in this cozy and inviting outdoor living area.
Add Texture, Depth, and Charm to Your Fireplace
A faux stone fireplace surround takes any ordinary room to the next level.
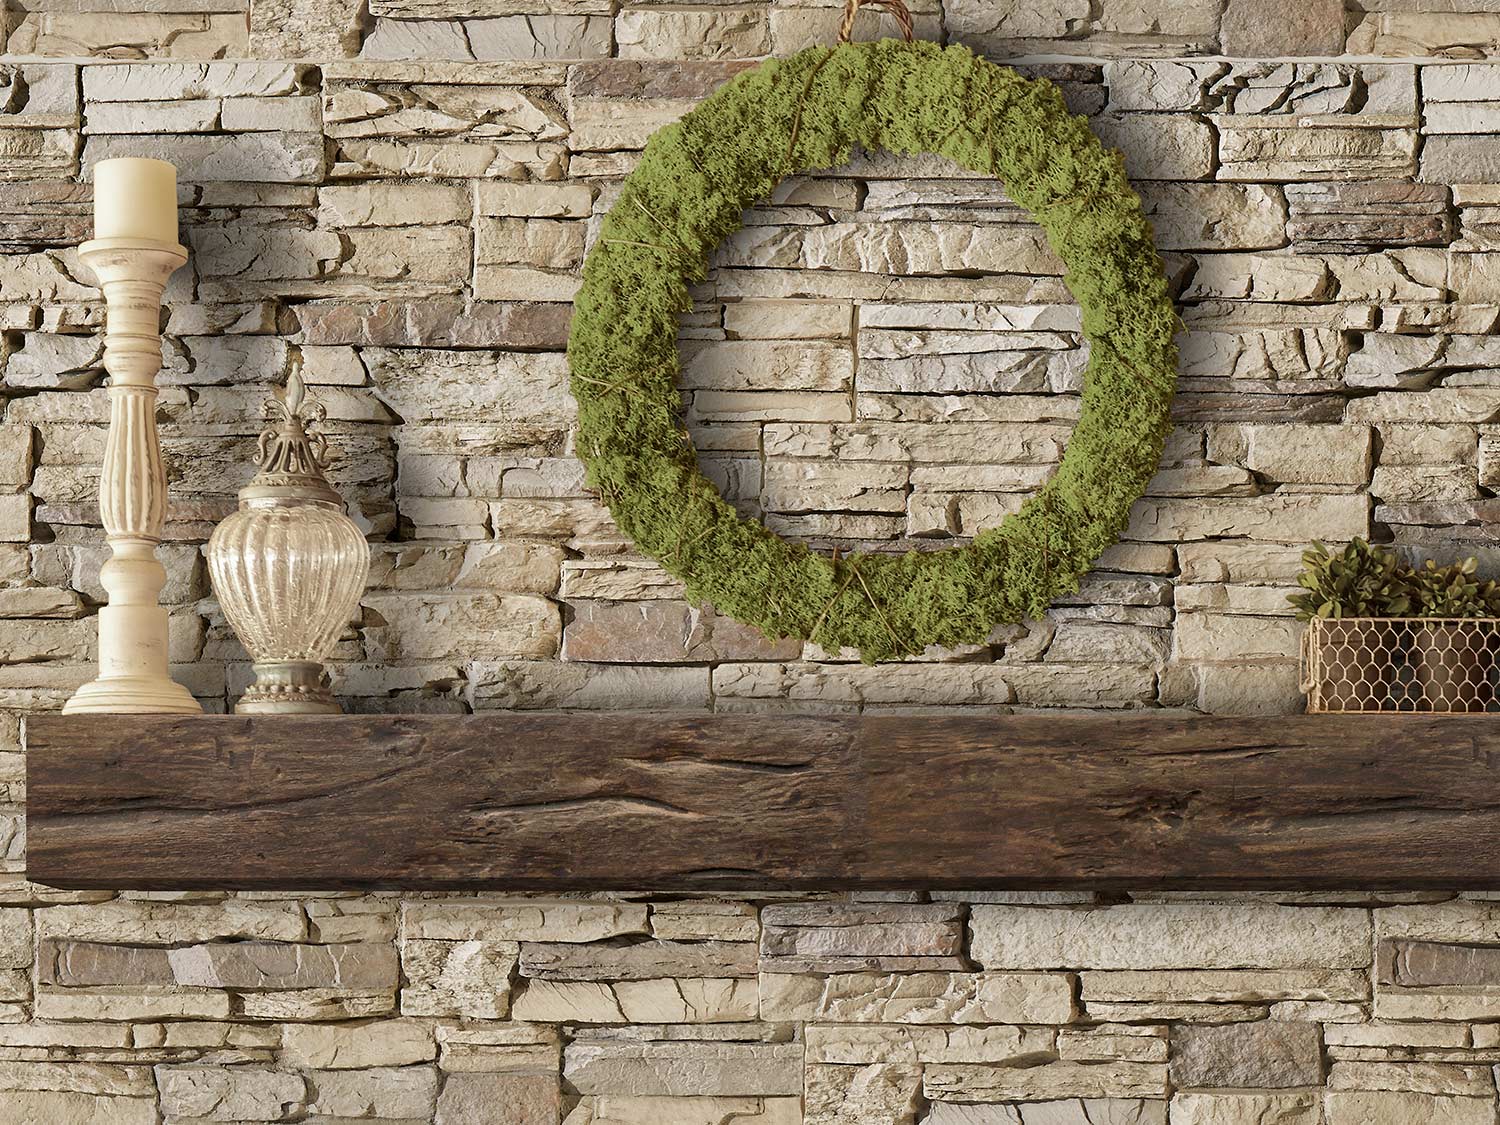
This showstopping fireplace surround has texture and depth thanks to Asheville Block Faux Stone Panels in Cliff Gray.
For an extra touch of natural charm, Hewn Faux Wood Mantle in Log is installed over the top of the panels.
 Asheville Block Faux Stone Wall Panels in Cliff Gray
 Sedona Dry Stack Faux Stone Wall Panels in Slate Gray
Design an Outdoor Living Space for Relaxation and Style
Covering a towering fireplace in real stone can be expensive and time-consuming.
Save money and time by creating a faux stone fireplace surround instead!
Sedona Dry Stack Faux Stone Panels in Slate Gray bring modern-contemporary flair and cozy, comfortable vibes to this outdoor covered patio.
Create an Ultra-Expensive Look With Affordable Faux Stone for the Fireplace
Although this looks like a fireplace surrounded with authentic fieldstone, this head-turning fireplace is covered in budget-friendly Sardis Fieldstone Faux Stone Panels in Beach Bluff.
Opting for a faux fireplace allows you to achieve the look and feel of real stone while avoiding high costs, upkeep, and complex installation processes.
 Sardis Fieldstone Faux Stone Wall Panels in Beach Bluff
Start Your Faux Stone Fireplace Surround Project Today!
From the living room to the bedroom to your outdoor spaces, fireplaces bring warmth, character, and a cozy atmosphere wherever they are. If your current fireplace feels outdated or lacks that “wow” factor, faux stone panels can instantly transform it into a stunning focal point.
Ready to give your fireplace a fresh new look? Explore our collection of faux stone panels and find the perfect style for your home.