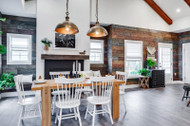
Faux panels are a beautiful yet easy way to enhance your home. Both faux stone and brick are lightweight, affordable, and easy to install. This has made them an extremely popular interior décor feature.
However, with all home décor, trends come and go. What you liked a few years ago may not match your taste now. Have no fear, though — if you have faux wall paneling, it’s easy to update your style.
Whether brick or stone, faux wall panels come in a variety of colors and textures to meet your design goals. If you want to update your faux panels, there are several ways to do this. If you do not want to remove your faux panels and replace them entirely, you can paint them instead to give them an update. You can use high-quality gloss or semi-gloss enamel paints for a fresh look.
If you’re ready for a complete change, though, faux panels can easily be removed to be replaced. This process is straightforward enough to do as a DIY – no need for professionals. That’s one of the great features of lightweight faux paneling.
Removing Wall Panels
If you previously installed the panels in your home using our install guide, you probably used a construction adhesive on the back of the panels and then fastened them down with screws. To remove the panels, you’ll have to do the reverse.
We’ve outlined the process of how to remove wall panels below. It’s easy enough to do as a DIY project, but if you have any questions at all, feel free to contact one of our Customer Experience & Design Consultants.
1. Set up your work area
Before you begin, you’ll want to set up a work area and gather your tools. In general, you’ll need:
- A screwdriver or drill
- A hammer
- A crowbar or tool to pry off the paneling
- A paint scraper to remove construction adhesive
- A tarp to cover the floor and any areas you want to protect
Cover the floor and move any furniture away from the area.
2. Remove screws from the paneling
If you used screws to attach the paneling to the wall, you’ll need to remove them with a drill or screwdriver. If screws were previously covered with caulk or wood filler, you may have to do a bit of searching to find where they are.
If nails were used to install the panels, you can skip this step, as they should come out as you pry the panels away from the wall.
3. Pry panels away from the wall
Once any anchoring screws have been removed, you’ll want to pull the panel away from the wall. To do this, you can either use the back of a hammer or a pry bar. Be careful not to damage the drywall, and be gentle as you pry it away from the wall.
If the paneling is made up of several pieces, you’ll need to repeat this with each panel until they are all removed.
4. Remove the construction adhesive
Before you install new panels, you’ll want to remove the old construction adhesive from the wall. You can do this by using a paint scraper. Keep the paint scraper flat against the wall while you gently scrape to remove old adhesive.
For any stubborn areas, you can use a hammer and chisel to gently tap away at the construction adhesive. Again, be sure to keep your chisel as parallel to the wall as possible to minimize any damage to the sheetrock.
5. Clean the wall and prepare it for the installation of the new panels
Once all the construction adhesive has been removed, you’ll want to prepare your space for the installation of new panels. This may include applying a fresh coat of paint to the wall to cover up any dings from the previous installation or removal process.
If you installed your panels over a hard surface, you’ll want to use a scrub brush to give the surface a good clean before you install the new panels. In general, you’ll want to remove any dust or dirt that will keep the new panels from sticking properly.
6. Install the new wall panels
You can follow our easy install instructions to help you install the new panels. The process is straightforward and simple to complete!
Planning Your Next Wall Panel Project
Need help or advice on how to remove old wall panels? Contact us today so we can assist you with your project and get you well on your way to achieving the look you want.
SPEAK TO A CUSTOMER EXPERIENCE & DESIGN CONSULTANT
If you need some inspiration, check out our design ideas where we have recent photos of a range of projects that have utilized our faux brick and stone wall panels.
You can also discover wall panel ideas and tips from these blogs: