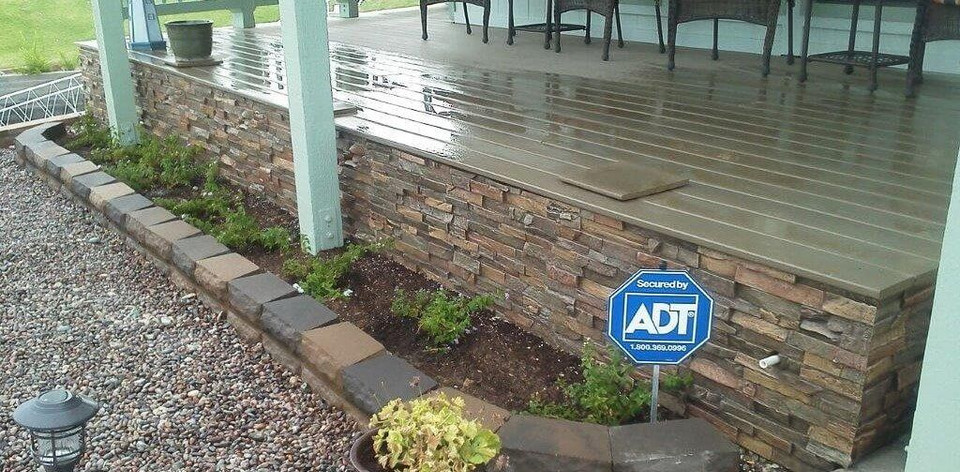
First impressions are important, and your home’s exterior is no different! When your home needs an update, the pop of natural color and texture of authentic stone can really boost its curb appeal. However, the expense of natural stone and the hassle of installing and maintaining it can be a real bummer.
Faux stone wall panels are an affordable alternative to natural stone veneer and are easy to install yourself. Whether you install a faux stone accent wall or cover your entire home, you’re getting the real stone look you want, without the expense and installation headaches.
Here, we’re summarizing how to install faux stone on an exterior wall and covering the benefits of choosing quality faux stone panels over natural stone veneer.
How to Install Faux Stone on an Exterior Wall
Exterior faux stone panels are incredibly easy to install! Below, we’ve outlined the installation steps to give you an idea of the process. When you’re ready to install your panels, follow our detailed installation guide with diagrams and descriptions that support the steps outlined below.
Helpful Installation Tips
- Before you get started, evaluate the structural integrity of the installation site.
- During the entire process, be sure to follow applicable local building codes.
- At least 24 hours before installation, allow your faux panels to acclimate by storing them flat in the installation location away from moisture, direct sunlight, and other heat sources.
Installing Faux Stone Panels: What You Need to Get Started
For a successful installation, you need the following tools and materials:

Installation-Specific Tools and Materials
There are two ways you can install faux stone panels.
Adhesive and Fastener Installation (Recommended)

Adhesive-Only Installation Over Concrete/Masonry/Metal

How to Determine Installation Workflow
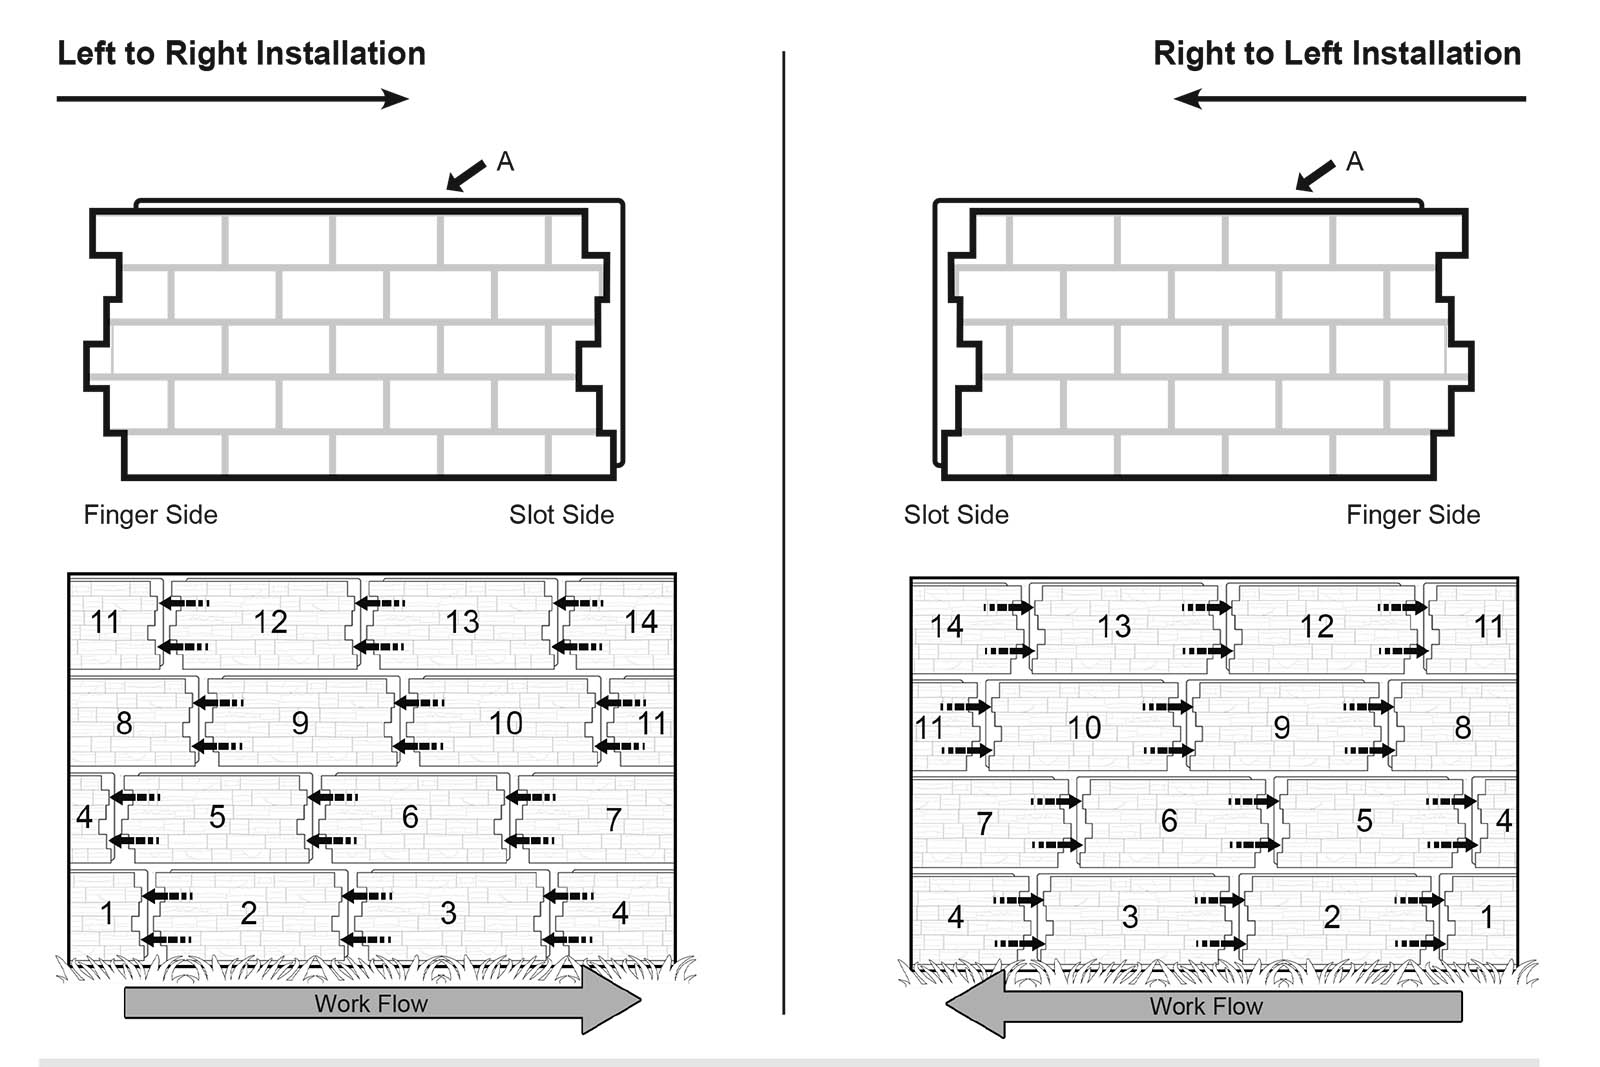
Before starting, look at your panels to determine which way they must be installed.
Installation will run left to right or right to left depending on the panel style. Orient one of your panels so that the flat lip on the long side (A) is up. If the fingers project to the left, the installation will run left to right. If the fingers are on the right side of the panel, your installation will go right to left.

Installation day summary:
Step 1: Orient Panels & Determine Installation Order
For a more realistic look, it's helpful to establish an order for the panels by laying them out before you start the installation process. As you lay them out, look at the variation in color and texture from panel to panel to ensure no one section draws the eye.
Step 2: Prepare Surfaces
Thoroughly clean the wall to ensure solid and lasting adhesion. If you’re installing over top of concrete or masonry, you may need to use a wire brush to remove loose particles. Wipe the back of the panels with a tack cloth to remove any dust or dirt.
Step 3: Install Drainage Mat
If you’re installing faux stone panels using the adhesive-only method over concrete, masonry, or metal, you can skip this step.
Install a drainage mat according to your local building codes. Be sure that the grid side of the mat is against the structure and that the flat side faces out.
Step 4:Trim the First Panel
Next, you’ll want to trim your first panel. If you will have to navigate corners as part of your installation please refer to the corner panel installation guide.
Measure and mark the panel for at least 12" from the finger side of the panel for your first cut. Use a wood-cutting saw with a finish blade to cut the panel. Save the remainder of the panel for use later in the project.
Step 5: Draw a Level Line
Establish your highest point of the first row and draw a level line along the entire length of the wall. This will keep your installation moving in a straight line.
Step 6: Apply Adhesive
Clean the back of your panel with a tack cloth, then either follow the adhesive-only application or the adhesive and fastener application depending on your installation method.
Step 7: Adhere the Panel to the Wall
Align the top of the panel with your level line, and with a healthy amount of pressure and a slight twisting motion, stick the panel to the wall.
Step 8: Reinforce with Screws
If you’re using the adhesive and fastener method, once your first panel is glued to the wall, reinforce it with screws. Apply one screw per square foot around the perimeter of each panel and through the middle of the panel. To hide the screws, place them under protruding rocks or in grout lines. Take care to not over-tighten the screws.
Step 9: Apply Adhesive & Textured Caulk to Prepare for the Next Panel
Apply a bead of adhesive along the slot and a bead of textured caulk where the two panels come together to ensure a watertight fit.
Now you’re ready to install the next panel. Make sure your panels stay level throughout the process.
Step 10: Repeat Steps 6-9 to Complete the First Row
Be sure to butt the panels tightly together while following your level line. Dry fit each panel before applying adhesive to ensure it fits flush. Trim if necessary. The last panel on the row will need to be trimmed from the finger side of the panel.
Step 11: Start the Next Row
Trim the finger side of the first panel on the next row at a different width than you trimmed the lower row so that the panel seams offset as you go up the wall. By staggering the seams from row to row, they will be less noticeable.
Apply adhesive to the top lip of the panel below, offset the seams, and start your next row directly above the first panel. From there, repeat the process until the installation is complete. To reduce waste, check to see if a previously cut panel can be used to finish the row before you cut a full-size panel.
Step 12: Touch-Up As Needed
Apply textured caulk to fill in any gaps, holes, or joints. Use a small paintbrush to carefully blend the caulk before it dries.
Use your touch-up kit to blend the caulk and cover any blemishes. Your touch-up kit will likely contain a base coat, tint, and wash. If your touch-up kit includes a base coat, apply a light layer, first, with a cotton swab. Allow this coat to dry completely. Then, apply the tint using a small paintbrush. Finally, if you have wash, apply it using a paintbrush and then blend it with a soft cloth.
How to Choose the Right Faux Stone Wall Panel

When you make an update to your home’s exterior, you want it to look great, and you want it to last. While there are several stone wall panel options available, they are not all created equal. Be sure to do your homework before making a purchase.
Before you buy faux stone wall panels, consider the following:
- Quality
- Durability
- Color/how natural the panels look
- Ease of installation
- Maintenance required
- Price (to purchase, install, and maintain)
A quality faux stone panel helps you achieve long-lasting, and more realistic-looking results. Over time, choosing quality faux stone panels saves you from the frustration of repairing and replacing cheaper panels that are more likely to chip, crack, and fade.
AZ Faux offers many faux stone wall panel styles in several different finishes, that each give your home’s exterior the same elevated look as real stone, without the expense. Unlike natural stone veneer, our faux stone panels are easy to install yourself, require little to no maintenance, and are made to withstand outdoor elements like harsh sunlight, moisture, and extreme temperatures.
Are you ready to make a home exterior transformation?