
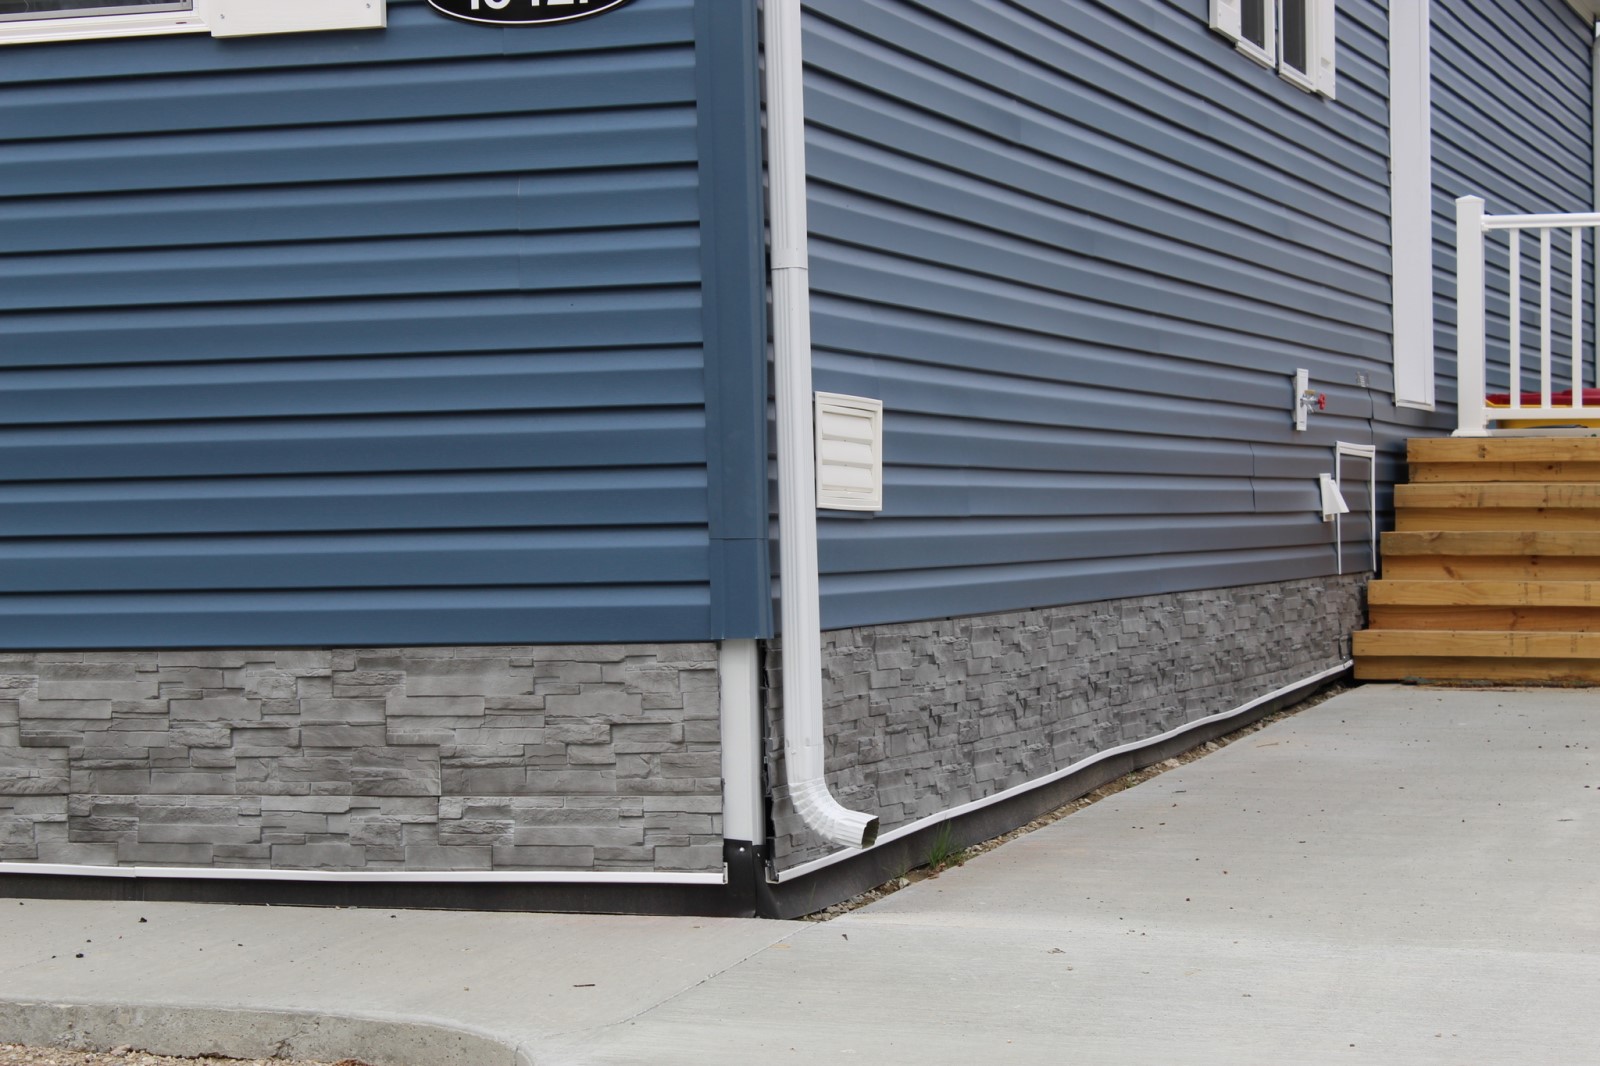
Seeking a straightforward and cost-effective way to enhance the appearance of your mobile home? Modern faux brick and stone exterior siding provides mobile home owners a quick and convenient way to stand out from the crowd.
Mobile and manufactured home skirting is most commonly made from steel or vinyl panels designed to match the existing exterior of your home. However, today, you can find realistic, affordable alternatives in faux brick and stone exterior siding. This siding is made of durable and flexible polypropylene, and it’s opening up far more options for homeowners.
In this guide, we’ll explore the benefits of using high-quality exterior siding as skirting for mobile homes and walk you through the key steps to achieve a durable, attractive finish that adds long-term value and curb appeal.
Benefits of Mobile Home Skirting
Installing mobile home skirting is more than an aesthetic choice. Quality siding, whether faux brick or faux stone, comes with several practical advantages:
- Durability: Skirting deters pests and helps protect the area underneath your home, thereby protecting its value and extending its lifespan.
- Lasting Aesthetic Appeal: Faux options outperform many traditional skirting products, elevating your home's appeal for years without cracking, fading, warping, or peeling.
- Cost-Effectiveness: Add real value to your home without breaking the bank.
- Easy Installation: Incorporating skirting is quick and easy, making it a great weekend DIY project.
- Compliance: Skirting options often meet or exceed local building codes and mobile home park and home association regulations.
Preparing for Skirting Installation
Before starting work, take time to prep the space around your home. This ensures a smooth installation process and better-looking and longer-lasting results.
Begin by clearing the area around your mobile home's perimeter of any debris or obstacles that could get in the way. The higher the ground is under your home, the easier the installation will be, so consider grading or backfilling areas to make the surface as even as possible.
Also, check for any existing fixtures, pipes, or wires that might interfere with the installation. You'll want to plan ahead to accommodate these elements while ensuring they remain accessible for future maintenance.
Tools and Materials
Make sure you have all the equipment you’ll need before starting work. Having the right tools on hand supports a smooth-running project and more professional-looking results.
Tools manufacturers recommend for siding installation include:
- Hammer
- Nails
- Box level
- Measuring tape
- Circular (Miter) saw
- Exterior siding panels
- Starter strips
- J-channel
- Decorative corner pieces
- Wood for framing the support structure
To calculate the number of panels you need, you will want to measure your mobile home's perimeter. Check out our quantity calculator (located on each product page) to calculate the correct amount to purchase.
Mobile Home Skirting Installation Steps
You've prepared the area, gathered your tools, and picked out your exterior siding panels. It’s time to get started!
Below is an installation day summary. When you’re ready to install, follow our detailed installation instructions.
*Note: These installation steps apply to Novik Exterior Siding Panels, but most other siding products have a similar installation process.
1. Prep Your Home For Skirting
Before building your support structure, make a plan.
In areas where the ground doesn’t freeze, you will secure your structure at the bottom of the home and into the ground.
In areas where the ground may freeze, fix the structure to the home and suspend it at least 6’’ from the ground.
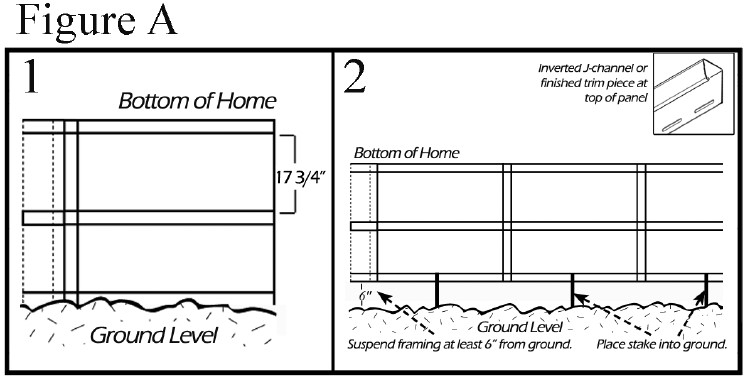
2. Build Your Support Structure
Build a structure under your home that will support the siding system. The support structure will consist of a grid of horizontal and vertical lumber that the panels will attach to. Vertical pieces should be no more than 36 inches apart. Horizontal pieces will be placed at the base of the home, the base of the support structure and, if stacking multiple panels, in line with the nail holes.
Finish the top edge of the structure with an inverted J-channel or other finished trim piece.
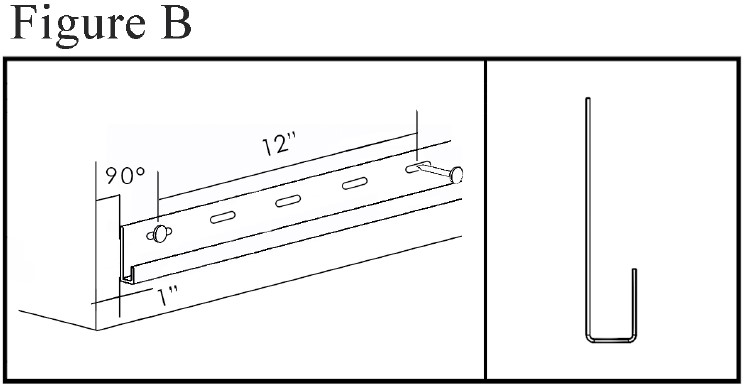
3. Install Starter Strip
Install a starter strip along the lowest point of the structure.
4. Install Your First Panel
Work from left to right. Cut the panel's left side in a straight line, then install the panel by locking it into the starter strip and nailing it to the support structure.
Each full-length panel must be secured by five nails.
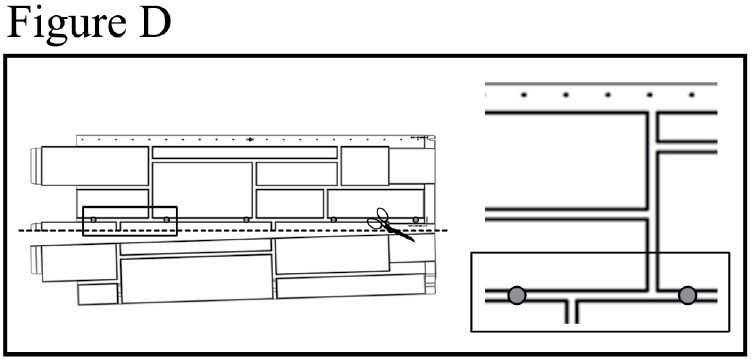
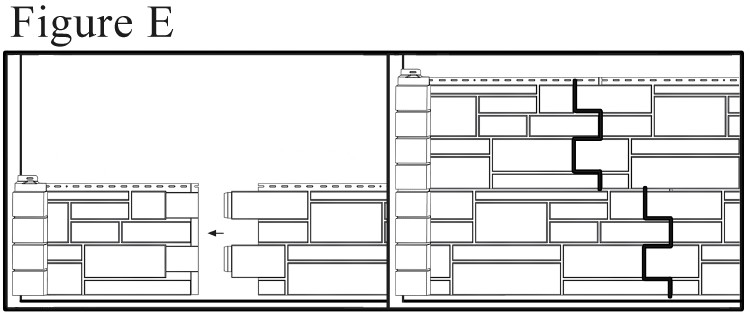
5. Align the Next Panel
Align the next panel next to the first one... Place nails in the center of the oval fixation holes and do not hammer them completely home to allow the panel to expand.
Repeat until you are done.
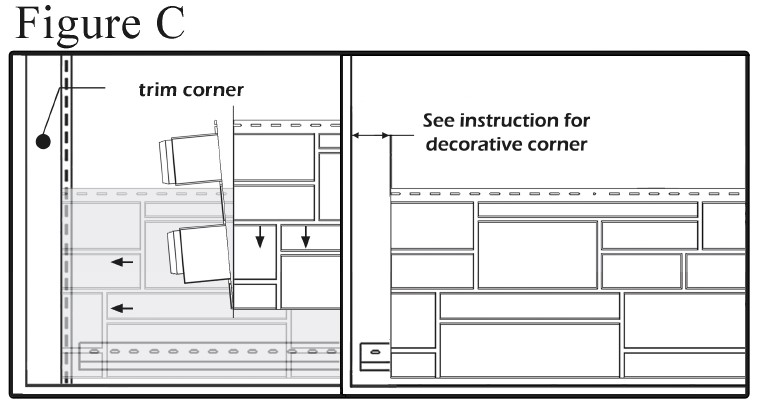
6. Install Decorative Brick and Stone Corners
If your design includes decorative brick or stone corners, these can be installed once you have finished installing the panels.
Corner pieces will either attach to the corner bases or will simply slide into the starter strip or the corner piece below it.
Visit our website for detailed brick and stone corner installation steps.
Explore Mobile Home Skirting Products
Our exterior siding panels are a perfect complement to mobile homes and ideal for use as underpinning / mobile home skirting. Each style is available in multiple colors. We suggest ordering samples of your favorites so you can compare and contrast them in your own home. Below are a few of our favorites.
Dry Stack Faux Stone Siding Panel
Designed to mimic real stone with varying heights and widths, Dry Stack Faux Stone Siding Panels are an excellent alternative to real, natural stone.
This style is available in nine authentic colors to beautifully match the look you're going for.
 Dry Stack Faux Stone Siding Panels in Basalt
Artisan Cut Faux Stone Siding Panel
Available in a palette of six earthy colors, Artisan Cut Faux Stone Siding Panels enhance your mobile home's exterior with a unique and distinguished look.
The stones of this panel are arranged in a staggered, irregular horizontal pattern, resembling natural stone wall construction.
 Artisan Cut Faux Stone Siding Panels in Fossil
Field Stone Faux Stone Siding
Getting the look of fieldstone has never been easier or more affordable.
Field Stone Faux Stone Siding Panels are the best way to give your mobile home exterior the look of authentic fieldstone, without the expense or hassle of complicated installation.
 Field Stone Faux Stone Siding Panels in Adirondacks
Hand-Cut Stone Siding Panels
When used as skirting, these siding panels, featuring an irregular stone pattern, can produce a uniquely natural and visually appealing aesthetic.
Available in four classic colors, Hand-Cut Stone Siding Panels pair well with other materials such as vinyl siding and shakes.
 Hand-Cut Faux Stone Siding Panels in Mountain Blend
RoughSawn Cedar Siding Panels
Does your mobile home skirting need an update? Consider this mobile home skirting option!
RoughSawn Cedar Shakes have the same organic, rustic grain patterns of real cedar, without the expense.
Best of all, this style blends seamlessly with craftsman, Cape Cod, coastal, and even modern exterior designs.
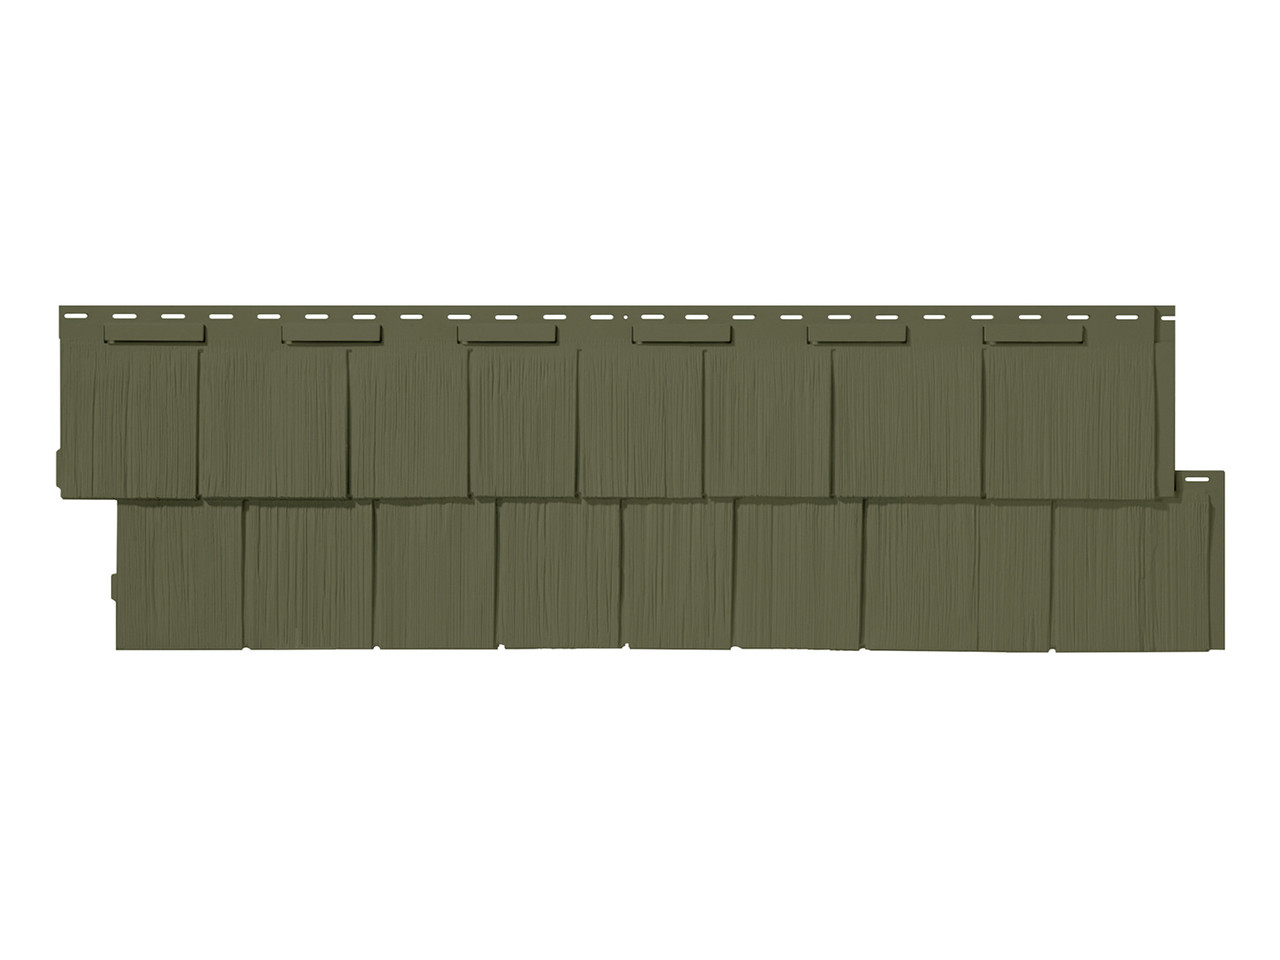 RoughSawn Cedar Siding Panels in Brunswick Green
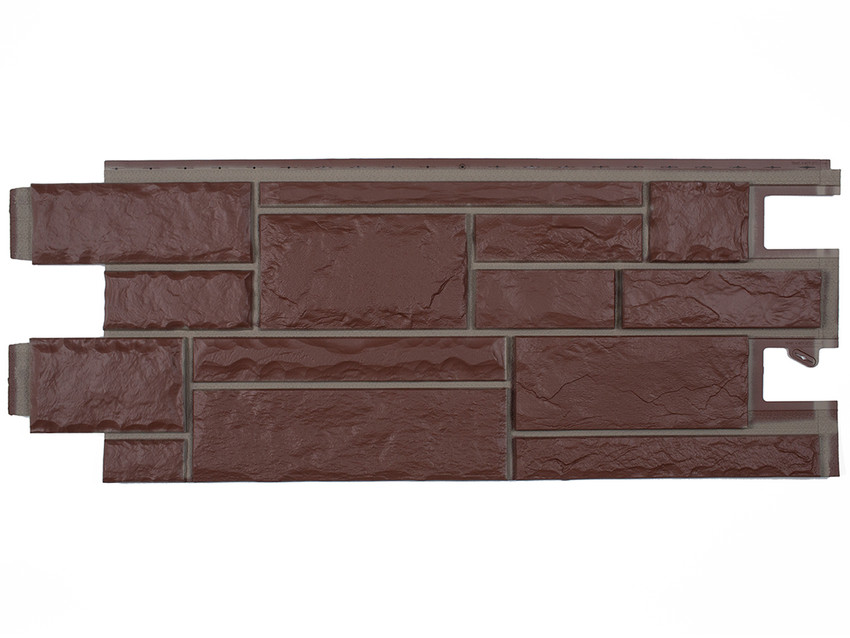
Hand-Laid Brick Siding Panels
The benefits of using faux brick over real brick are nearly endless.
This faux brick style has the same look and feel as the real thing, but is much easier to install and maintain.
Elevate your mobile home skirting with Hand-Laid Brick Siding Panels – available in four natural colors.
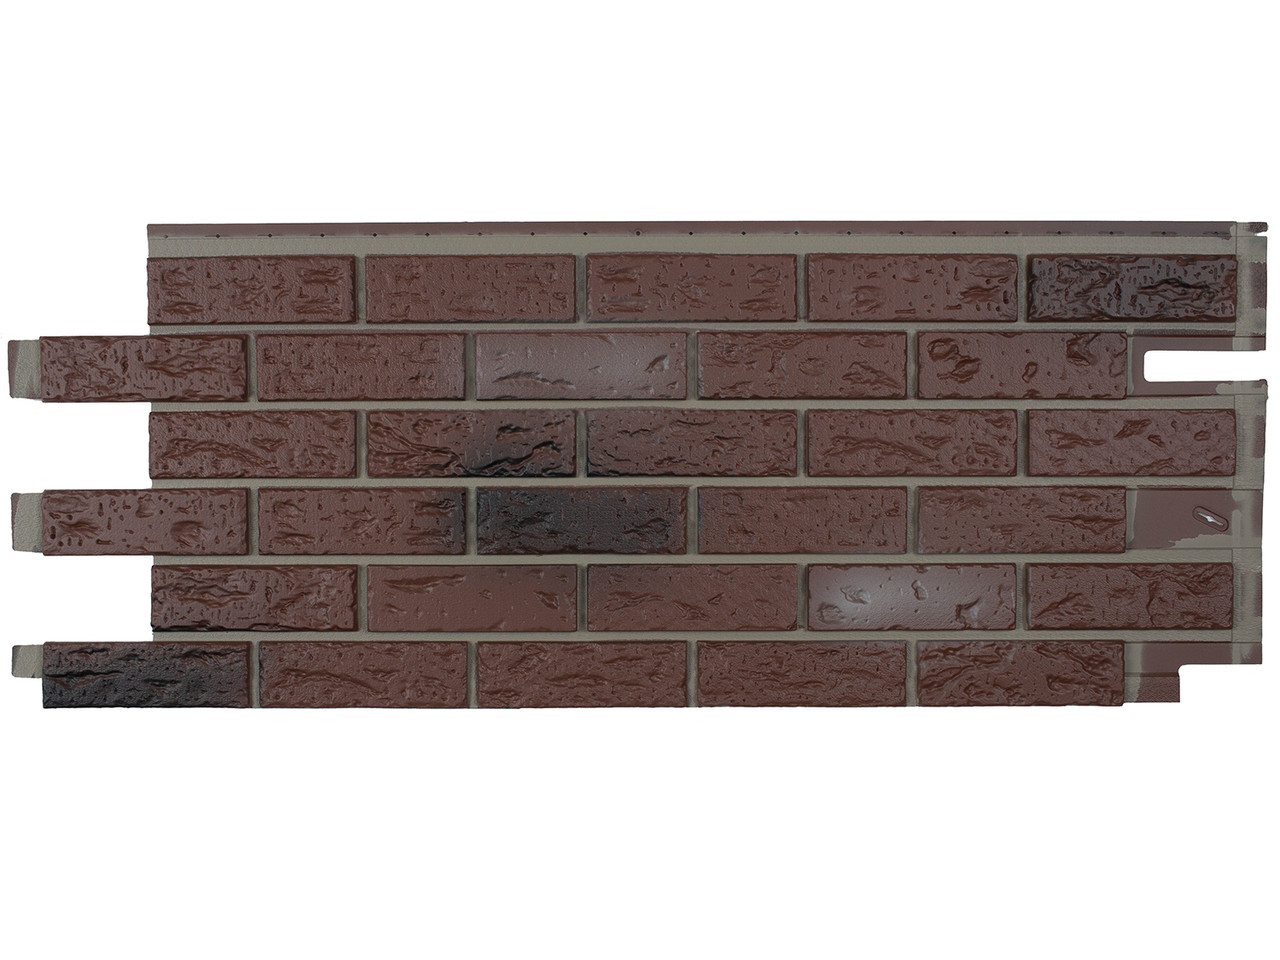 Hand-Laid Brick Siding Panels in Old Red Blend
Mobile Home Skirting Installation FAQ
How do I secure mobile home skirting to the ground?
Build a structure under the home that will support the siding. In areas where the ground doesn’t freeze, secure the structure at the bottom of the home and into the ground.
In areas where the ground may freeze, fix the structure to the home and suspend it at least 6’’ from the ground. Your suspended structure should be staked to the ground.
You can fill the space with landscaping or ground cover for an aesthetically pleasing, finished look. The vertical frame should not be spaced more than 36”, and the horizontal strapping must form a flush surface for proper installation of panels.
How much does it cost to put new skirting on a mobile home?
Mobile home skirting costs depend largely on two things:
- What the skirting is made of.
- Whether or not you hire a contractor to install it.
Using faux brick or stone siding panels as mobile home skirting can save money in several ways:
- Installation is an easy, DIY project – no need to hire a professional.
- The siding itself is more affordable to purchase, ship, and install than real brick and stone.
- Faux exterior siding requires little to no maintenance, saving money over time.
To help you determine your siding costs, use the quantity calculator located on each product page. After you’ve measured your mobile home for skirting, input the measurements into the calculator. From there, our automated system will tell you how many panels you’ll need to complete the job.
What is the best material to skirt a mobile home?
The best material for skirting a mobile home is a quality material that lasts. Be sure you purchase a material that’s specifically for exterior use, easy to install, easy to maintain, and within your budget.
AZ Faux Exterior Siding Panels are manufactured specifically for outdoor use. Each panel is resistant to rotting, warping, fading, and damage from pests. Compared to many other siding options, our collection of exterior siding panels is more affordable, easier to install, and requires little to no maintenance.
Who can put skirting on a mobile home?
Mobile home skirting can be installed by anyone. AZ Faux products are designed to be easy to install, but you are welcome to hire a professional to install them if you prefer.
If you plan to DIY the installation, follow our step-by-step mobile home skirting installation instructions.
Faux Finish, Real Quality
At AZ Faux, our faux brick and stone exterior siding is made of durable, molded polypropylene and is a great alternative to the traditional siding used in most mobile home skirting products.
Choose from our wide range of warm, inviting exterior siding products in realistic brick and stone finishes, or consult our handy color guide. We also have the rails, vents, and other accessories you need to ensure your siding lasts well and looks new for longer.
Click below to learn how our siding products can help you add real value to your home at an unbeatable price.
VIEW OUR EXTERIOR SIDING PANELS