
Usually, if you want natural stone in your home, it needs to be installed during construction. On top of that, it’s expensive and time-consuming.
Fortunately, faux stone panels are easy to install anytime in your interior areas, such as walls, under cabinets, and anywhere else you want a rough rocky texture. You just need a few basic tools and some rudimentary DIY knowledge.
Installing Faux Stone: What You Need to Get Started
Before you get started, lay your panels out flat in the installation area for at least 24 hours. This will help your panels acclimate to the room. Next, make sure your installation surface is structurally sound and free from cracks, holes, moisture, or other damage.
Once any issues are fixed, gather the following tools and materials:
- Caulk gun
- Chalk line or laser
- Clean cloth
- Color-coordinating textured caulk
- Cotton swabs
- Level
- Loctite® PL® 3X Premium Construction Adhesive
- Panels
- Pencil
- Safety Glasses
- Small paint brush
- T-Square
- Tack cloth
- Tape measure
- Touch-up kit
- Water
- Wood cutting saw with finish blade
- Tape measure
- Screw gun
- Deck screws
Note: (1) tube of Loctite® PL® 3X Premium Construction Adhesive is typically needed for every (3) panels. (1) tube of textured caulk is typically needed for every (4) panels.
Adhesive and Fastener Installation
- Deck screws
- Screw gun/drill driver and driver bits
Adhesive-Only Installation Over Concrete/Masonry/Metal
- Disposable gloves
- Great Stuff applicator gun
- Great Stuff Pro gun cleaner
- Great Stuff Pro Construction Adhesive
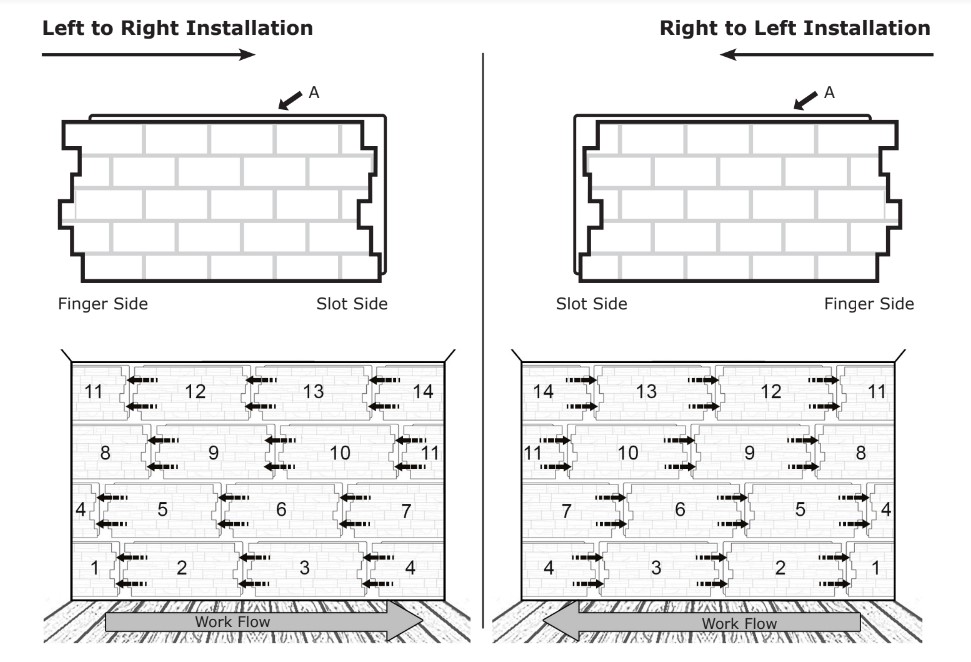
Determine Your Installation Workflow
Your faux stone panels can only be installed either left to right or right to left. The photo below will help you determine in which direction to go for the installation process.
Lie your panels flat with the “A” lip away from you. If the fingers stick out to the left, you will install your panels left to right. If the fingers protrude to the right, you will install your panels from right to left.
Haven't gotten your Faux Stone Panels yet?
How To Install Faux Stone Veneer On Interior Areas
You can install faux stone panels anywhere, including on drywall. Below is an easy installation overview. Here is a link to more detailed instructions.
Helpful Hint: For the most natural look possible, be sure to offset your seams.
Step 1. Orient Panels & Determine Panel Installation Order
Orient each panel so that the flat lip on the long side “A” is up. Often, panels will have an “A” or “B” stamped on the flat lip to indicate different molds. Alternate between “A” and “B” panels when both are available.
Step 2: Prepare Your Surfaces
Clean all surfaces to ensure that panels adhere properly. This includes the wall and back of each panel.
Step 3. Trim Your First Panel (if needed)
If you are installing interlocking corners, you can skip this step.
Turn your panel over and mark where you intend to make the cut. Trim the panel using your wood cutting saw with a finish blade. It’s always best practice to measure twice before you make a cut.
Trim at least ¼ of the panel off to help reduce waste.
The slot side will be used first. Reserve the finger side for use later in the project.
Step 4: Draw a Level Line
Place a panel flat on the floor and against the wall. Mark its height. Then, draw a level line that runs the length of the wall to indicate the top of the first row of panels. This will keep your project moving along in a straight line.
Step 5: Install Corner Pieces (optional)
If you are installing any corner pieces, the first corner must be installed before starting the first row of panel installation. To install the first corner, follow steps 6-8.
Step 6. Apply Adhesive
Again, wipe the back of your panel with a cloth to remove debris.
Fastener and Adhesive Installation:
Turn the panel over and apply beads of adhesive to the back of the panel in vertical lines no more than 3” apart. Then add a dab of adhesive to the back of each finger.
Adhesive-Only Installation:
Apply Great Stuff adhesive to the back of the panel. Starting about 2 inches from the edge, apply beads of adhesive in vertical lines 6 inches apart from each other. Lastly, add a dab of adhesive to the back of each panel finger.
Step 7. Apply the First Faux Stone Panel to the Wall
Use a slight twisting motion to ensure good contact. Make sure the panel is level, lines up with the level line you drew in Step 4, and is plumb with the edge of the wall.
Step 8. Secure With Screws
NOTE: Skip this step if installing with the adhesive-only method.
Fasten the panel to the wall by inserting deck screws. It’s best to have screws about a foot apart around the perimeter and one per square foot throughout the panel. Place screws under protruding rocks or in grout lines to make them less noticeable. Take care to not over-tighten screws.
Step 9. Apply Adhesive and Caulk
Add adhesive to the lip of the panel, and a bead of textured caulk where the face meets the panel. Caulk must be added during this step, for protection from water and a more realistic finish. Use a damp cloth to remove excess adhesive or caulk.
Step 10. Repeat Steps 6 Through 9
Repeat steps six through nine for each panel. Fit the panels tightly together while following your level line. The last panel on the row will have to be trimmed from the finger side of the panel. Wipe off any excess caulk or adhesive with a damp cloth before it dries.
Step 11. Start the Next Row
Start your next row directly above the last one while making sure to offset the seams of the panels for a more natural layout.
Take your time when adhering to the next panel to ensure a tight fit with the panel below. Continue this process until you are finished covering the existing surface.
Step 12. Touch-Up as Needed
Once all your panels are installed, add finishing touches with a bit of caulk and paint for a seamless finish.
If your touch-up kit contains a base coat, use a cotton swab to apply a light layer of the base coat and allow it to dry. Using a paintbrush, apply the appropriate paint, then dab with a soft cloth to blend and allow to dry.
If your touch-up kit contains a wash, apply the wash using a paintbrush and dab it with a soft cloth to blend. If the bottle is labeled “wash concentrate,” add tap water to the neck of the bottle, screw the lid back on, and shake to mix before using.
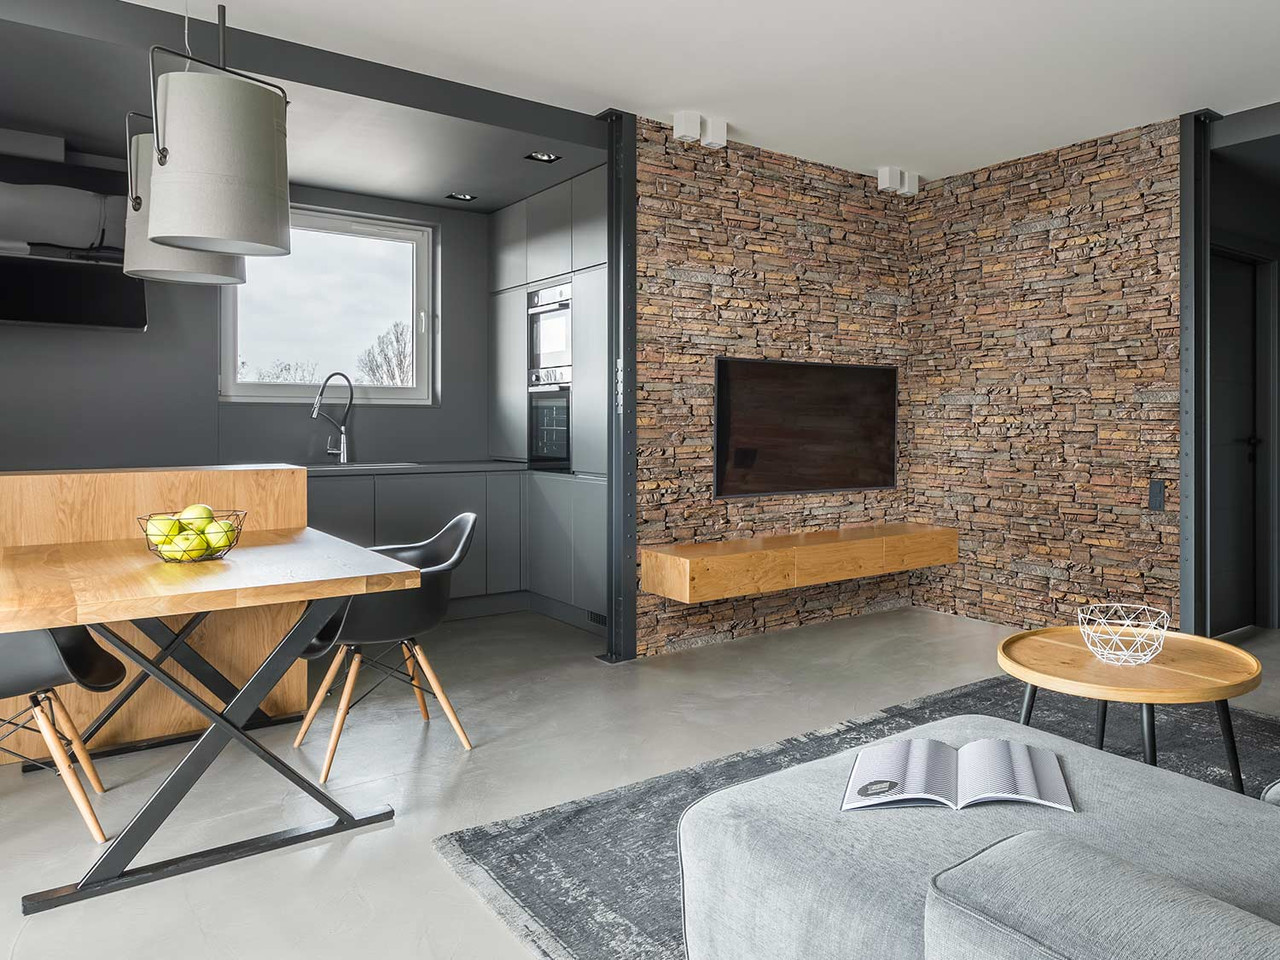
Transform Your Home’s Interior with Faux Stone Veneer
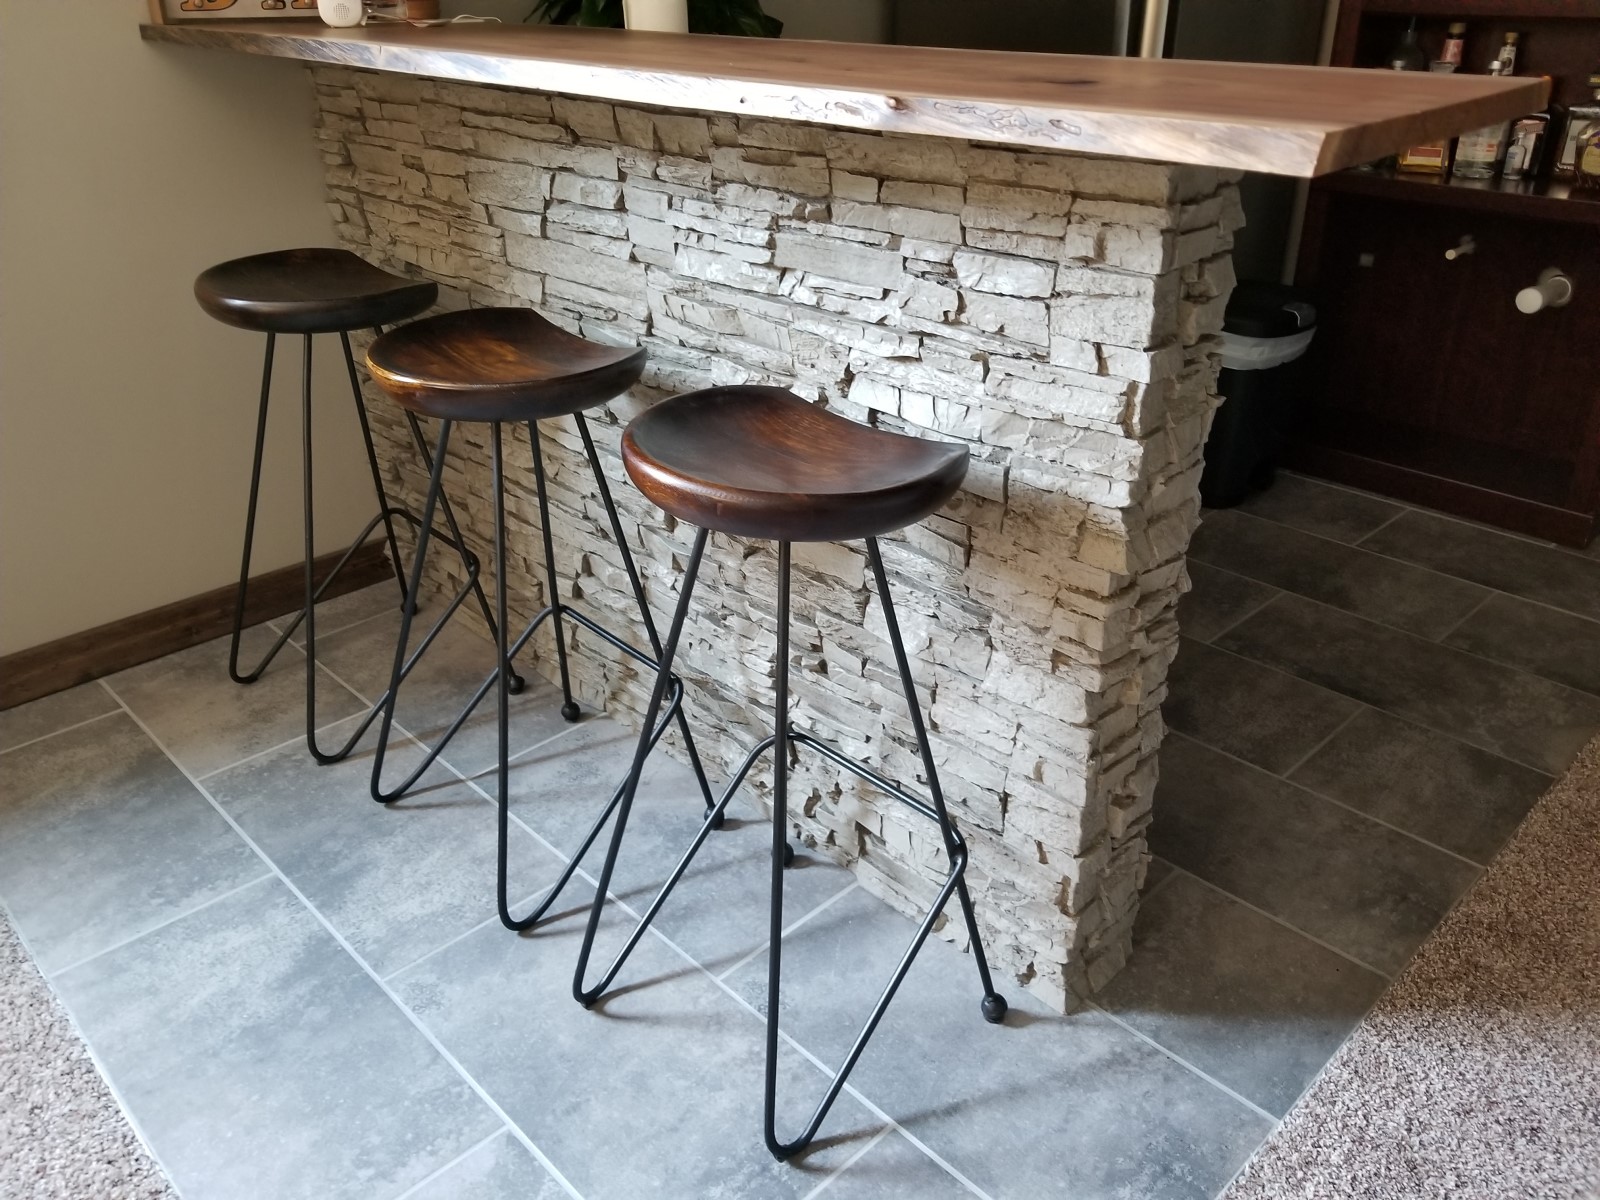
Bring warm, rugged beauty to your home’s interior with high-quality, realistic-looking faux stone panels. No matter how “handy” you are, panel installation is an easy and affordable DIY project you can complete on your own.
Ready to get started with your Faux Stone Panels project?